Tools Needed Before Painting Drywall
Tools needed before painting drywall: Wall painting may seem like a simple task at first glance, but in reality, it’s a highly sophisticated craft that requires skill, precision, and a keen eye for detail.. If you want smooth walls with a professional finish, you need to choose the right tools. Proper preparation saves time, reduces mistakes, and helps your paint last long.
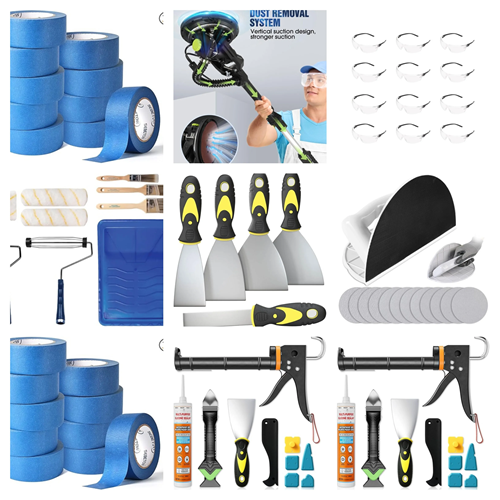
Here are all the tools you need before painting drywall:
1. Drywall Sanding Tools:
New drywall and repaired areas need to be made smooth. Sanding removes bumps, ridges, and rough joint compound present in new drywall and repair surfaces.
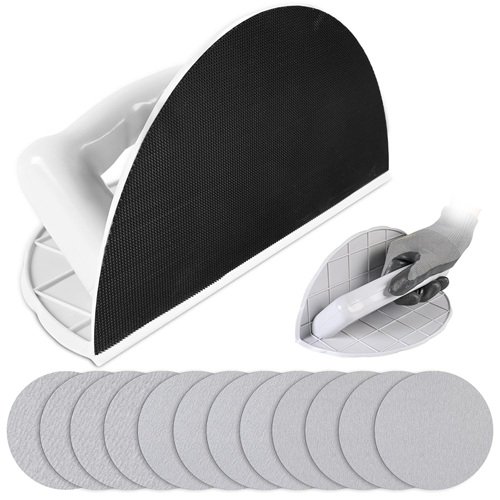
Sanding Sponge or Sanding Block: A sanding sponge is suitable for small areas and corners. It is easy to hold that gives better control.
Pole Sander: A pole sander is the perfect choice when you have large walls and ceilings. It helps you sand faster and reduces back strain.
Bonus-Tip: Use fine-grit sandpaper (120–220 grit) to avoid damaging the surface.
2. Dust Removal Tools:
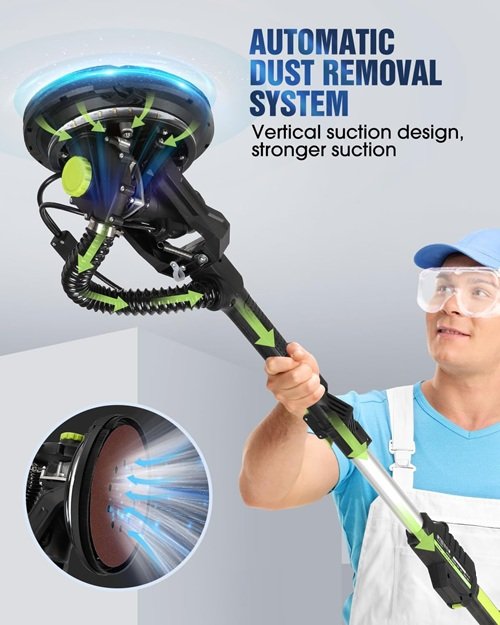
After sanding, the floating dust will cover the wall surface. Painting over dust can cause poor adhesion and rough texture. So, either you need a shop vacuum or a cloth.
Shop Vacuum: A shop vacuum with a fine dust filter quickly removes most of the dust from your wall surface.
Microfiber Cloth or Tack Cloth:
After vacuuming, wipe the wall with a cloth to remove the remaining dust. Clean walls help primer stick better to the wall.
3. Putty and Putty Knife (For Wall Repairs):
Before painting, you should inspect the wall carefully. Nail holes, dents, and small cracks will show through paint if not repaired properly.
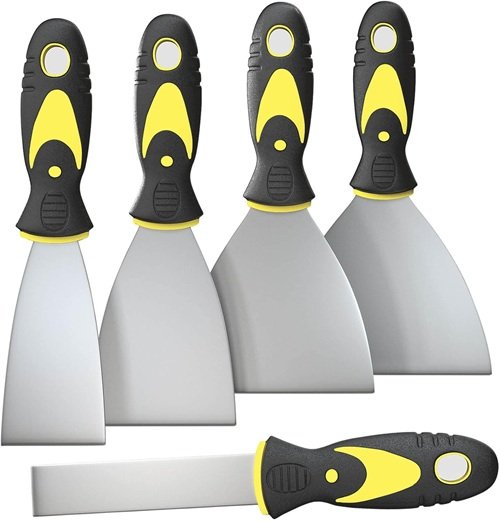
Putty (Spackle): Putty is used to fill nail holes, screw marks, small dents, cracks, and uneven surfaces. It creates a smooth surface so your paint looks flawless. Choosing a high-quality lightweight putty is a smart decision because it dries faster, sands easily, and shrinks less.
Putty Knife: A putty knife is used to apply and smooth the putty. Press the putty firmly into the hole, scrape off the excess, and let it dry completely. Once dry, sand the area lightly until it blends with the wall.
Skipping this step can ruin the final look. Even small imperfections become visible after painting.
4. Caulking Tools:
Gaps between drywall and trim can make a room look unfinished.
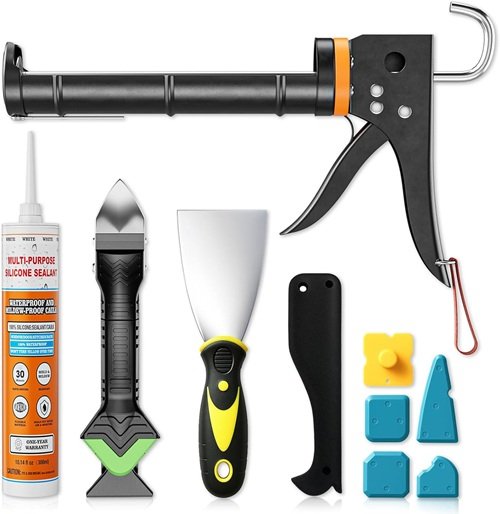
Paintable Caulk: Use paintable latex caulk to seal small gaps around baseboards, window frames, and corners.
Caulking Gun: A good caulking gun gives better control and makes application cleaner and easier.
This step helps create smooth transitions and a more professional finish.
5. Surface Protection Tools:
Painting is not something you should rush, or you may spill paint and damage your walls and floors. So, surface protection tools are very important. These are:
Drop Cloths: Use canvas or plastic drop cloths to protect floors and furniture. Canvas is reusable and durable. Plastic is affordable and good for quick projects.
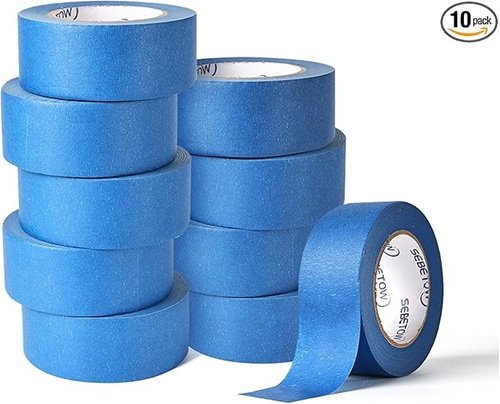
Painter’s Tape: Painter’s tape protects trim, outlets, and edges. It helps you achieve clean, sharp paint lines.
6. Primer and Application Tools:
Primer is essential for new drywall. Drywall absorbs paint unevenly, which makes the surface look poor. So, we have to use primer that will seal the surface.
Drywall Primer: A high-quality primer creates an even base and improves paint adhesion. Well-applied primer reduces the number of paint coats needed.
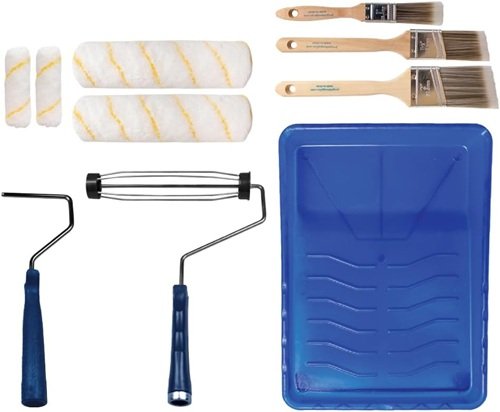
Paint Roller and Roller Cover: A 3/8-inch nap roller cover works best for smooth drywall. A good roller ensures even coverage.
Angled Paint Brush: An angled brush will help you cut in around corners and edges with precision.
7. Safety Gear:
Do not forget personal protection.
Dust Mask: Sanding creates fine dust. A dust mask protects your lungs.
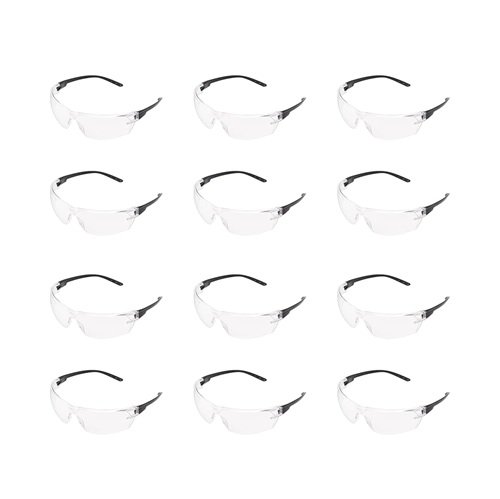
Safety Glasses: Safety glasses protect your eyes from dust and debris during cleaning and painting operations.
Finally,
Painting drywall successfully starts with proper preparation. When you use the right tools, i.e., sanding tools, dust removal tools, putty and putty knife, caulk, drop cloths, painter’s tape, primer, and quality brushes—you get smoother walls and better results.
Investing in good tools before you paint will save you time, reduce frustration, and help you achieve a clean, professional finish that lasts for years.